What is the dream of traveling into the unknown, exploring remote corners and enchanting landscapes? For many of us, this desire for adventure and freedom leads to a fascination with off-road vehicles. At the heart of this fascination is a Polish classic - the Honker. An off-roader with exceptional strength and character that has won the hearts of automotive enthusiasts and travelers for years.
This article will take you into a world of unlimited possibilities, where the Honker ceases to be an ordinary vehicle and becomes an expedition companion. Together we will discover how to rebuild this iconic vehicle to meet the demands of long expeditions, difficult terrains and unforgettable adventures.
Transforming a Honker into an expedition vehicle is not only a technical challenge, but also an artistic revolution that will allow you to customize the vehicle to your dreams and needs. From mechanical modifications to interior equipment, everything is designed to make the Honker an integral part of your unique journeys. On this journey through the rebuilding process, you'll learn what changes can be made to achieve the perfect balance between travel comfort and off-road capability.
I invite you to dive into this story of Honker's transformation into a vehicle ready to conquer the toughest trails, face adventures and leave a mark in travel history. May this inspiring journey through Honker's metamorphosis prompt you to take on your own challenges and realize your dreams of unforgettable expeditions.
Since the material is quite extensive I will divide it into parts.
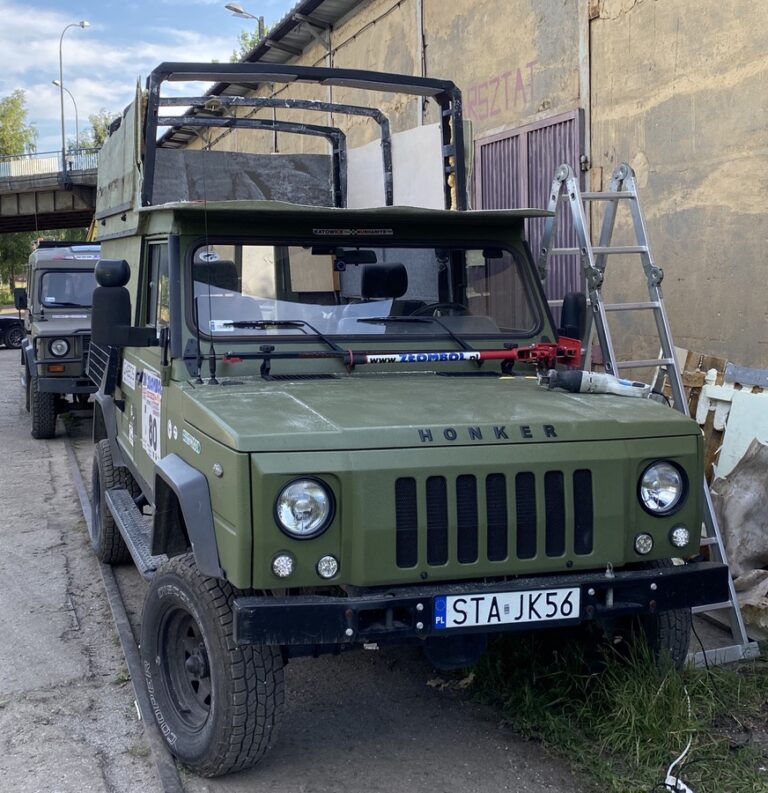
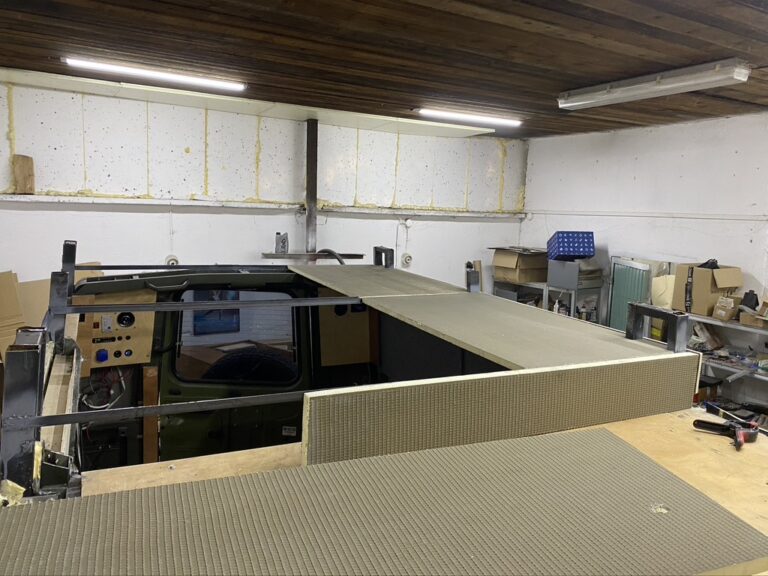
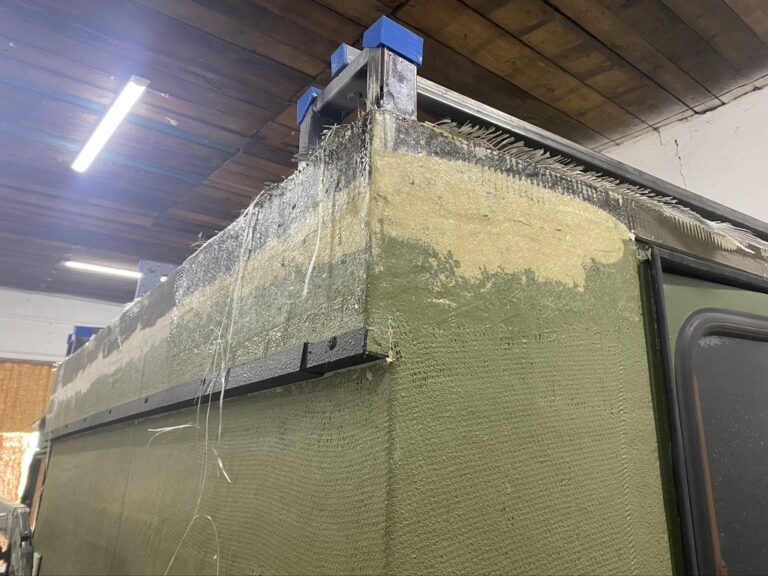
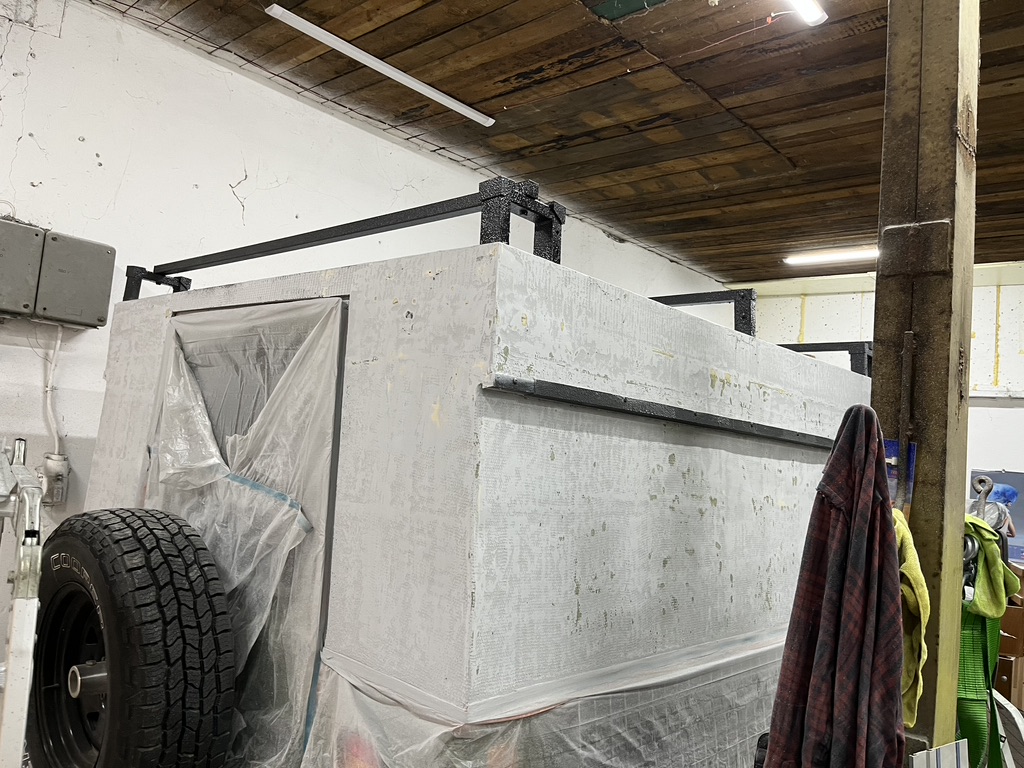
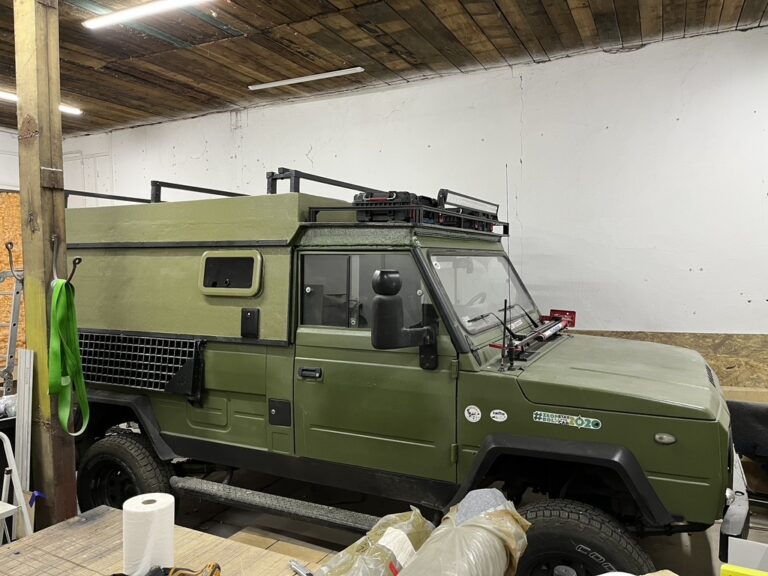
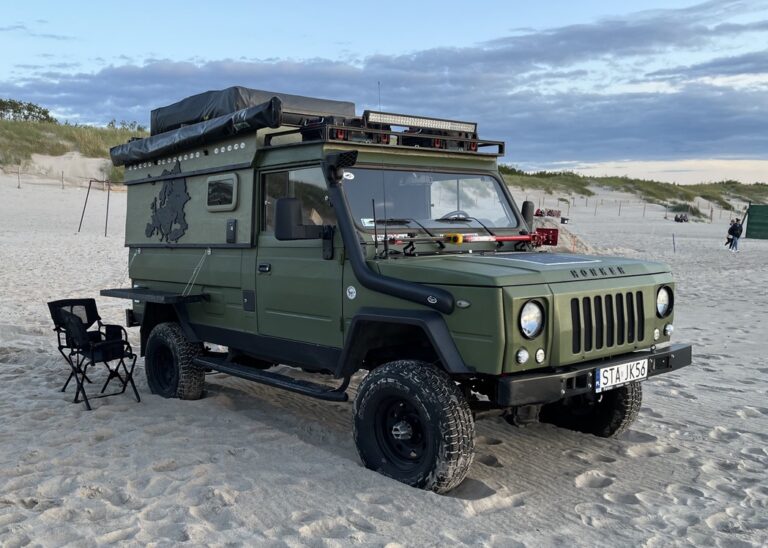
I'll start with the actual construction of the "pack", which is actually the living area. As you know, every Honker has risers at the back, either as a support for the tarp or for the hardtop. I couldn't find a new-type hardtop, so I decided to do it my way. On the standard risers I put the other ones, of course, twisting and welding so that the structure is stable.
This made it possible to widen the structure slightly at the top of the lower risers and pull it upward.
Of course, not all the height of the upper risers was needed, so they were cut down to the height of the brackets in the front and rear risers.
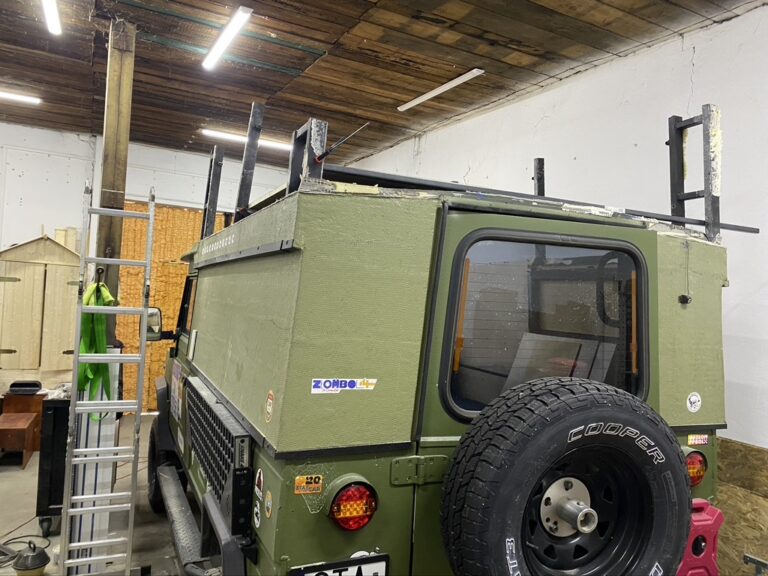
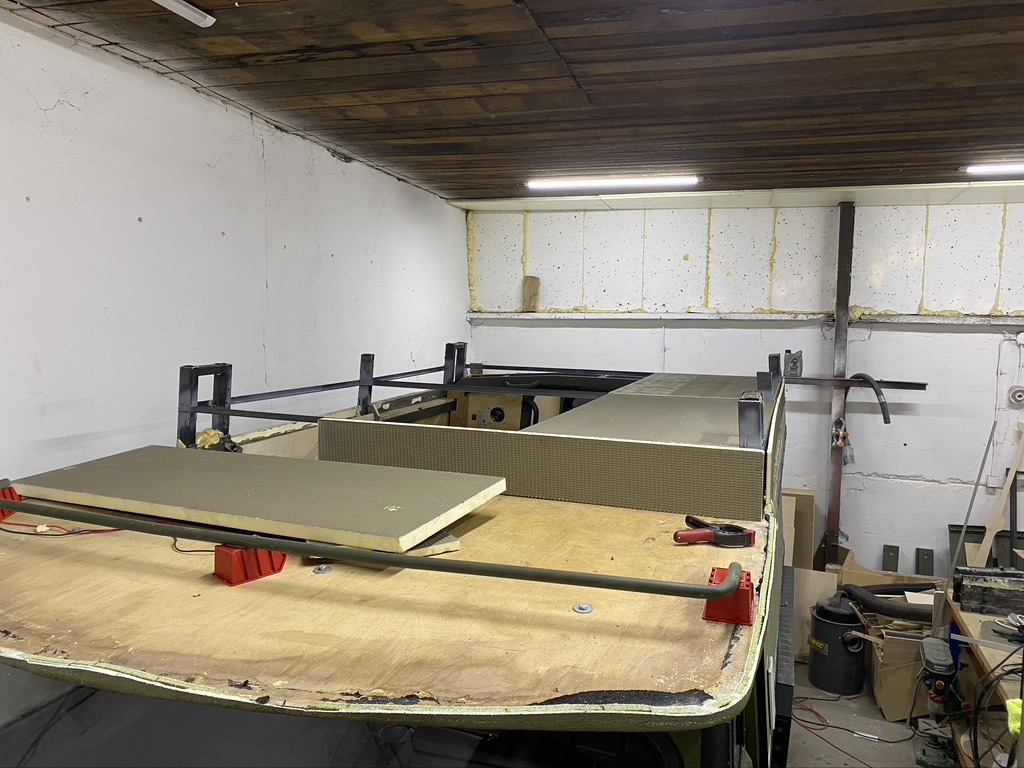
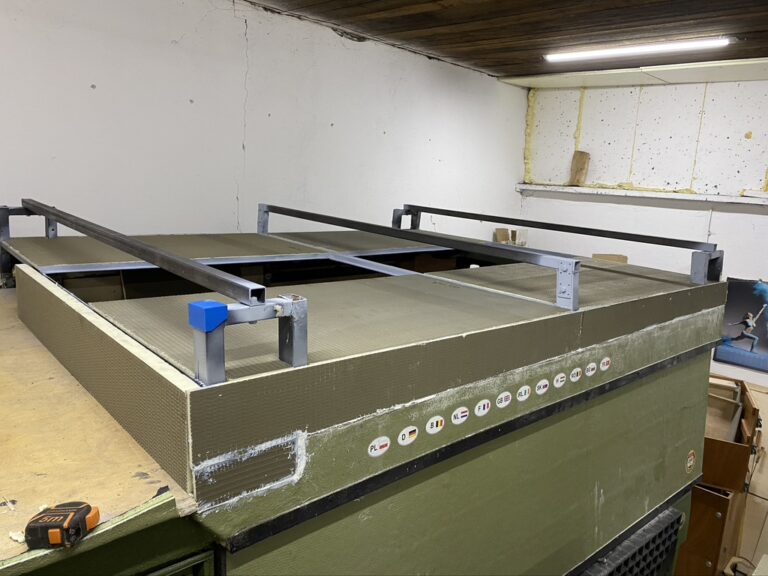
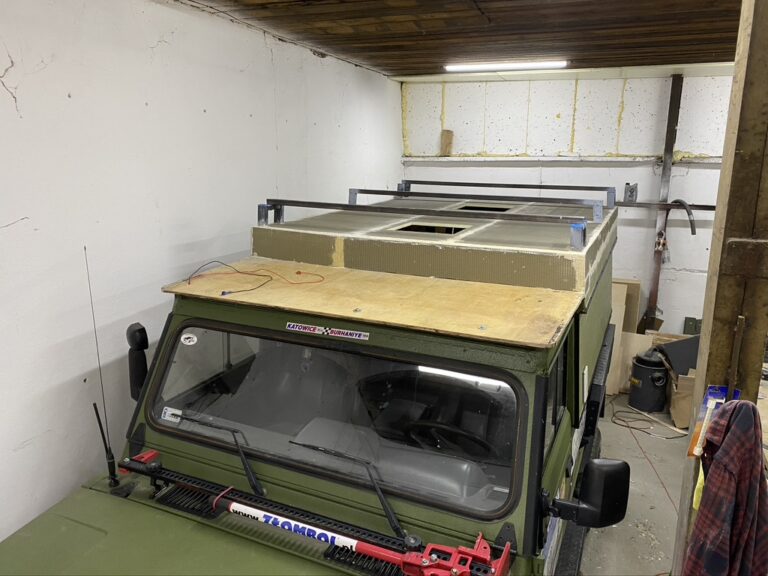
The roof structure is made of steel channel sections, which provide a solid structure on one side and a base for sandwich panels on the other.
As sheathing I used reinforced building panels available in popular markets (such styrodur only reinforced) with a thickness of 3 cm, which gives good thermal insulation.
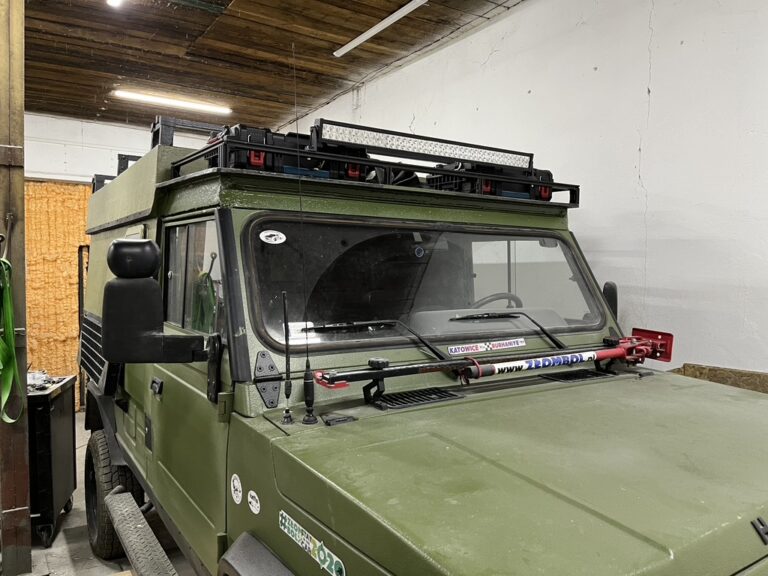
The upper protruding stubs of the arches were connected by steel profiles that are also roof rails.
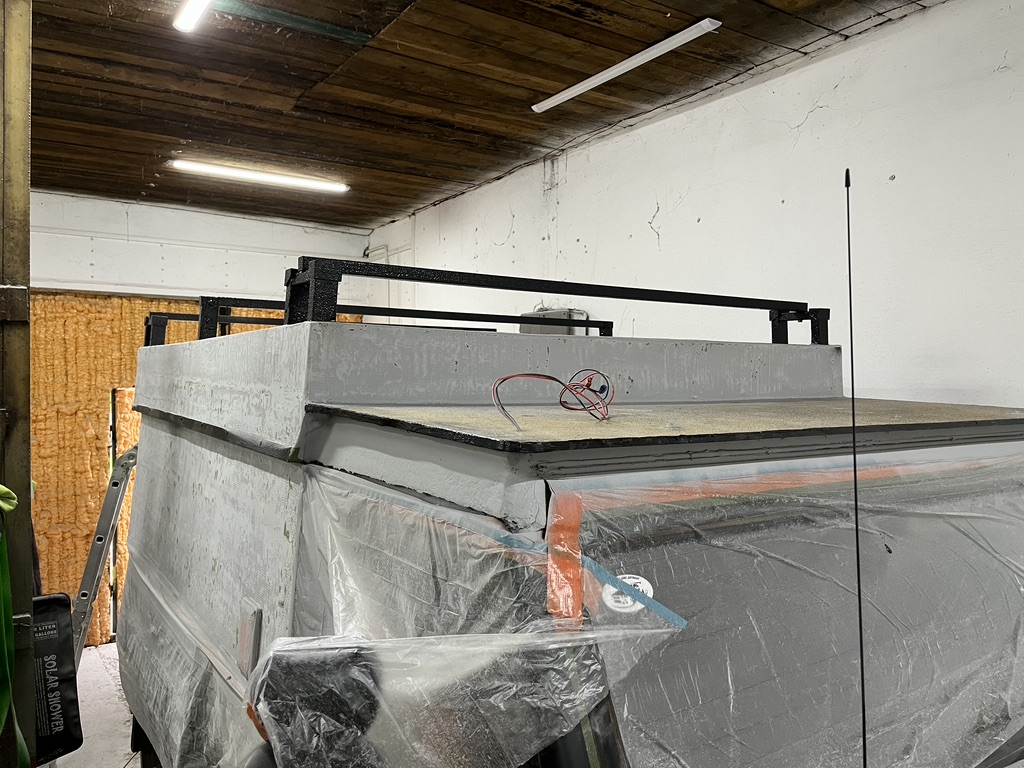
There are two window openings left on top. Standard camper roof windows with a size of 40×40 cm.
Above the cab, the roof was made of 12mm plywood while being the base of the roof rack.
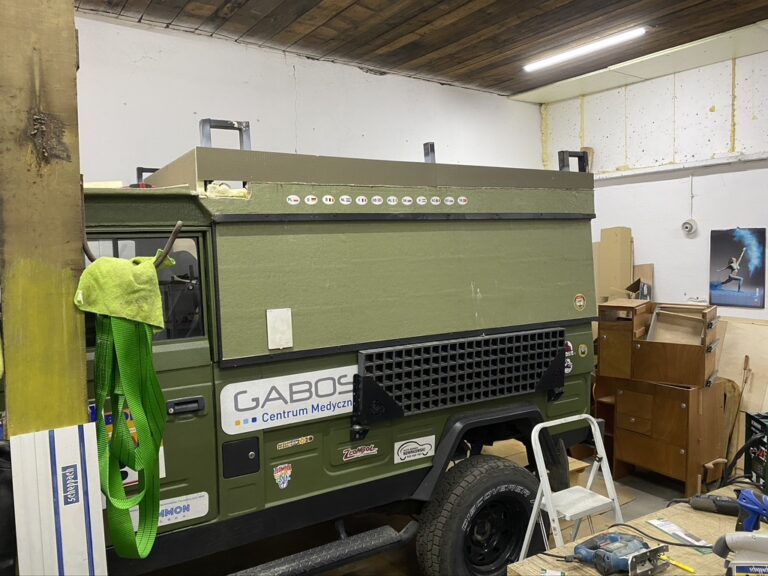
The whole thing, after sealing and puttying, was covered with several layers of laminate so that it is a uniform shell that strengthens but also seals the whole thing.
The final result looked more or less like this:
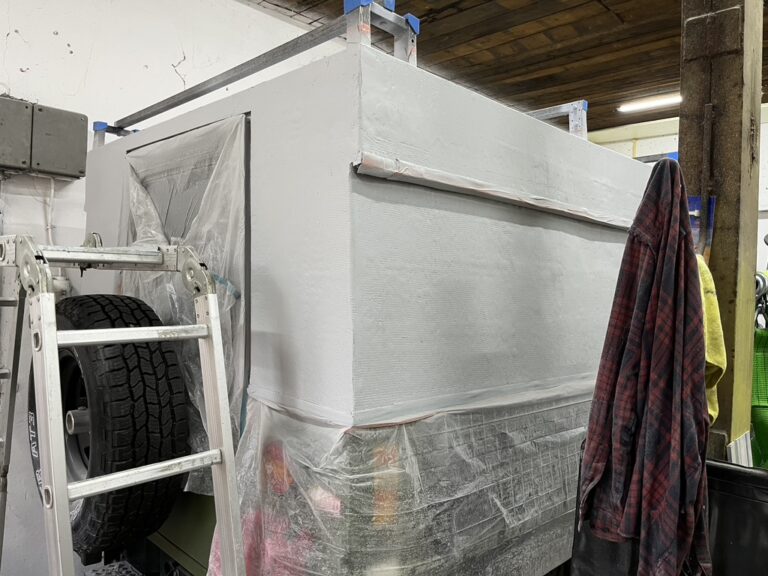
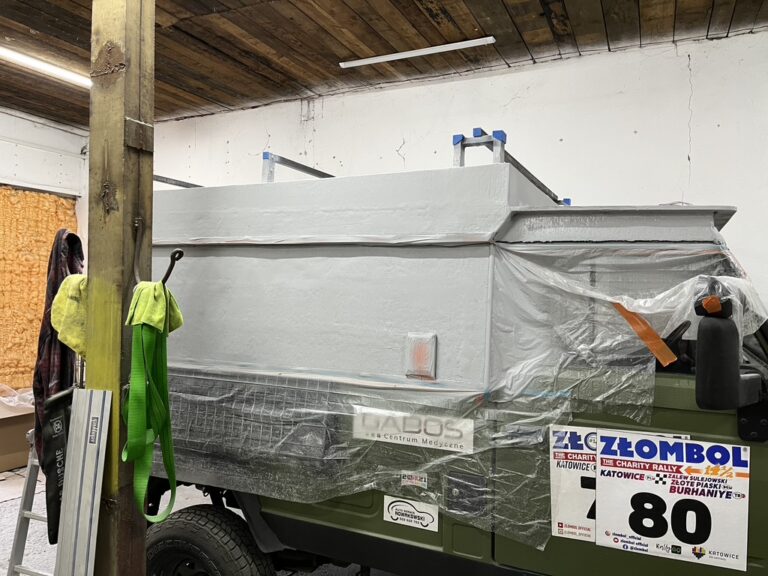
Later, the whole thing was spray-coated with putty and sanded.
Because it is purely a garage job, the size of the laminated parts, etc. Itp. It is to the smoothness of the surface that one can have many reservations. It doesn't bother me exactly so it is what it is.
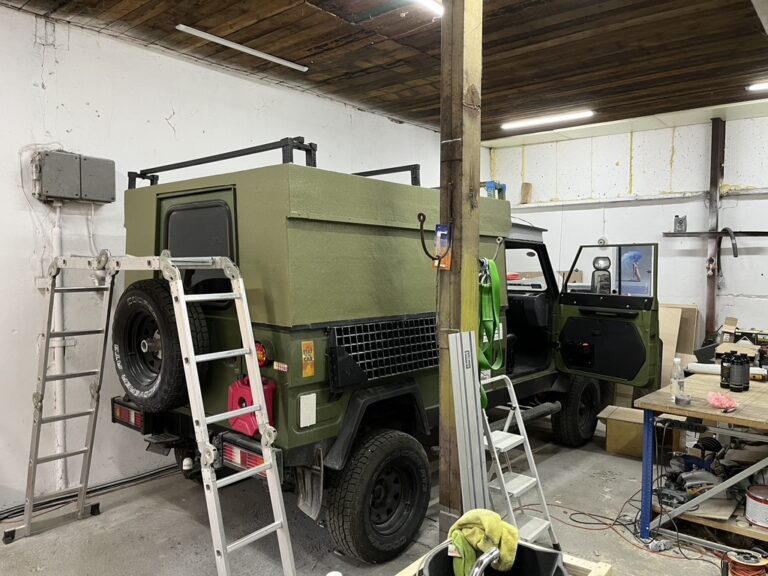
On such a prepared surface came a coat of paint, or spray rapotor. Mainly because of its ease of use, but also because of its properties, namely mechanical resistance.
In addition to color accents - black inserts there was a window on the passenger side. It is a yacht window, because I needed a window of such a size that would fit between the steel elements of the structure. It is used for two reasons. First, it allows the driver to see what's going on behind on the right, especially when turning left, and second, it ventilates the cabin at the rear.
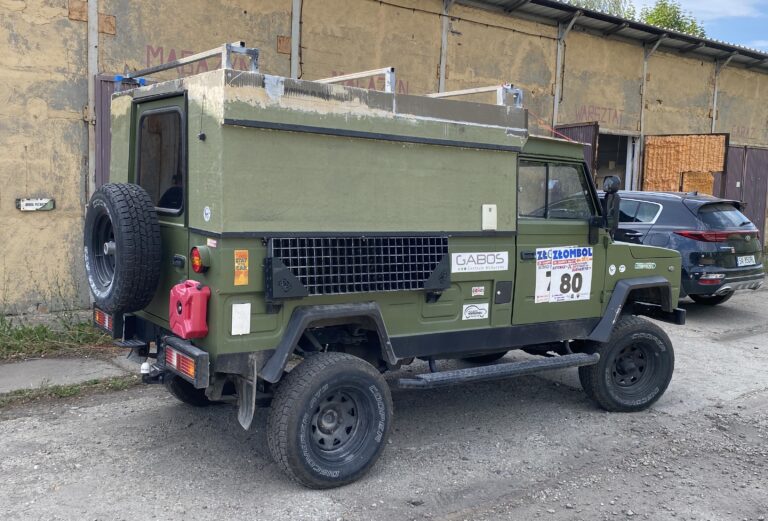
Above the chassis, a railing was created from aluminum profiles, which is also the base for the ledbar, and boxes for spars landed there. I used tool boxes also available in home improvement stores. They are reasonably roomy and airtight. They could be a little bigger, but oh well.
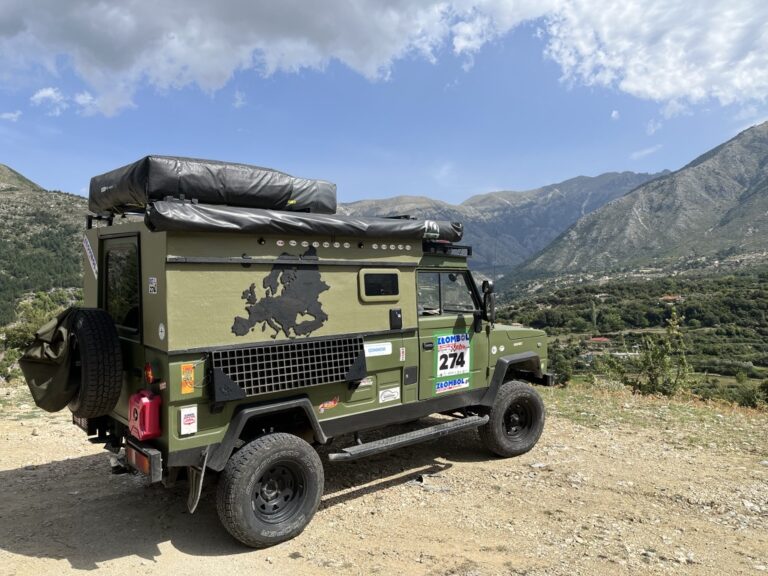
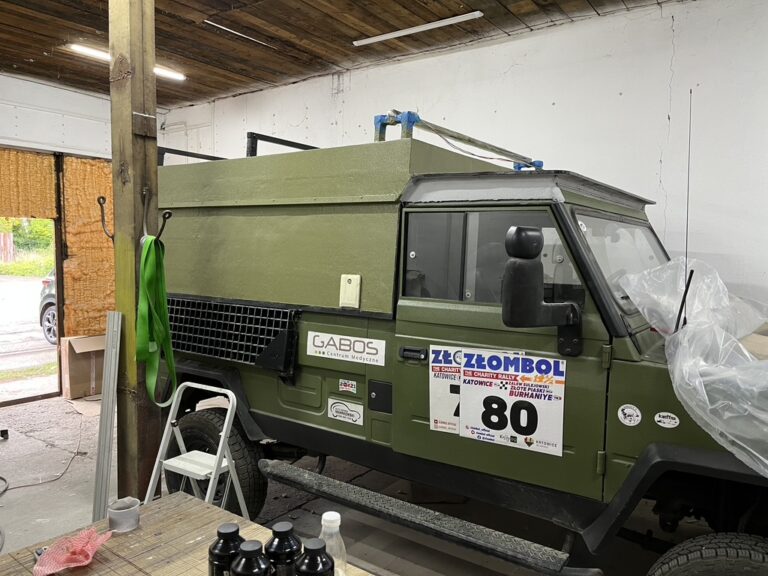
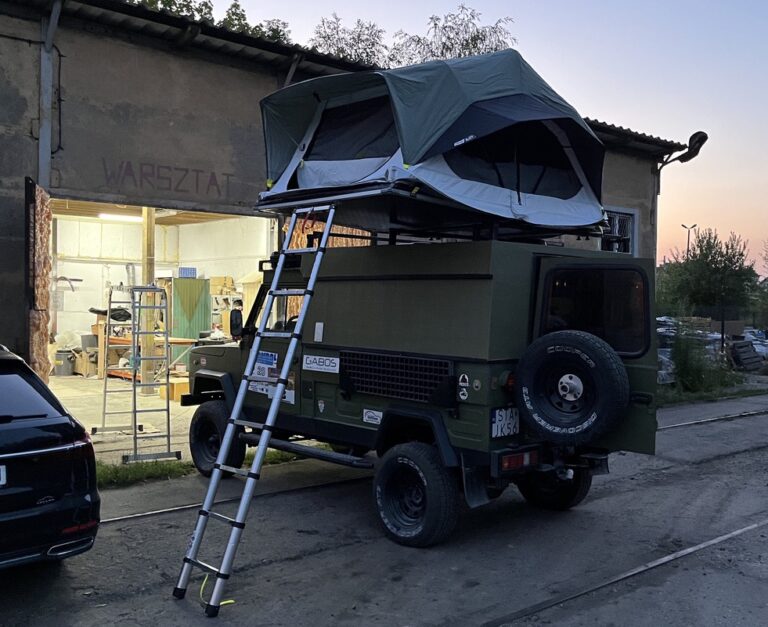
As you can see, roof rails are a solid base for a roof tent.
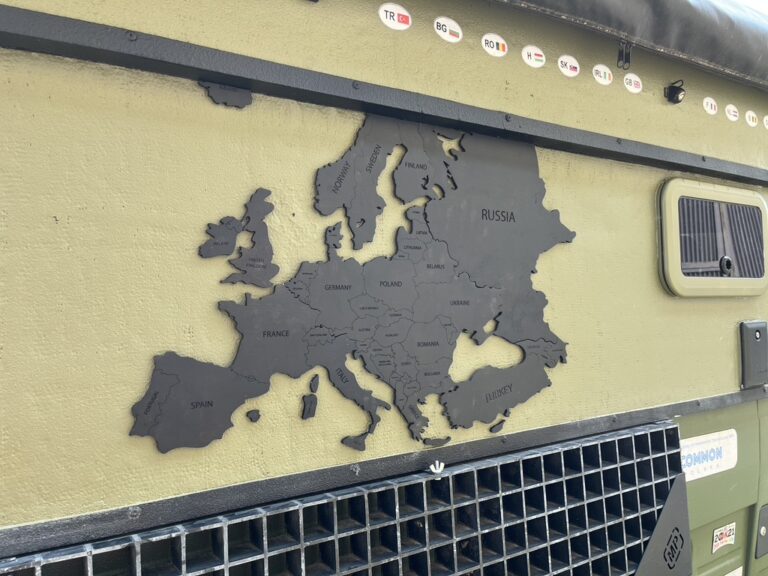
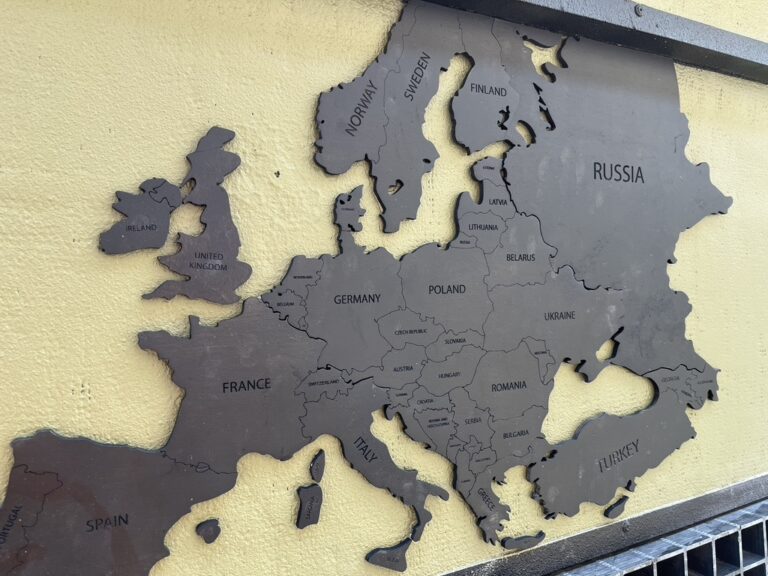
Finally, 3D maps landed on the sides, with a map of Europe on one side and a world map on the other. Such maps can be purchased on many portals. There is a decorative element made of plywood. I only waterproofed it and painted it so that it can withstand external weather conditions. Glued with a strong glue, they hold without objection.
The final presentation is as follows:
In the next parts, I will cover the interior and exterior accessories.
Author: Grzegorz Siwiec Publication date: August 13, 2023
One comment on Converting a Honker to an Expedition


One comment on Converting a Honker to an Expedition
A piece.of.great.work.