
Additional installations in the honker
When traveling in an expedition vehicle, the goal is not just to survive in new and unfamiliar places. It's to seek harmony between nature and modern conveniences that make it possible to live in peace and satisfaction, regardless of the distance from civilization. The concept focuses on creating a place where basic needs, such as cooking, washing and lighting, are met with appropriate installations.
Electrical installation
We will start with the electrical system which is probably the most complex.
The assumption was that additional installations would not use the car's starter battery, because it must always be in working order, hence the appearance of an additional battery called a hotel battery. In my case it is a 130 Ah AGM battery. It fell on the AGM because practicality and price appealed to me. Although LiPO4 batteries are lighter, they are also much more expensive and cannot be charged in freezing temperatures. Gel batteries are less durable, so in the price/quality/versatility calculation, AGM won out. I assumed charging the hotel battery from three sources: classically from a 230V source and a rectifier/charger, the alternator while driving and the sun through a solar panel.
Below is a diagram of the wiring I have done in the Honker.
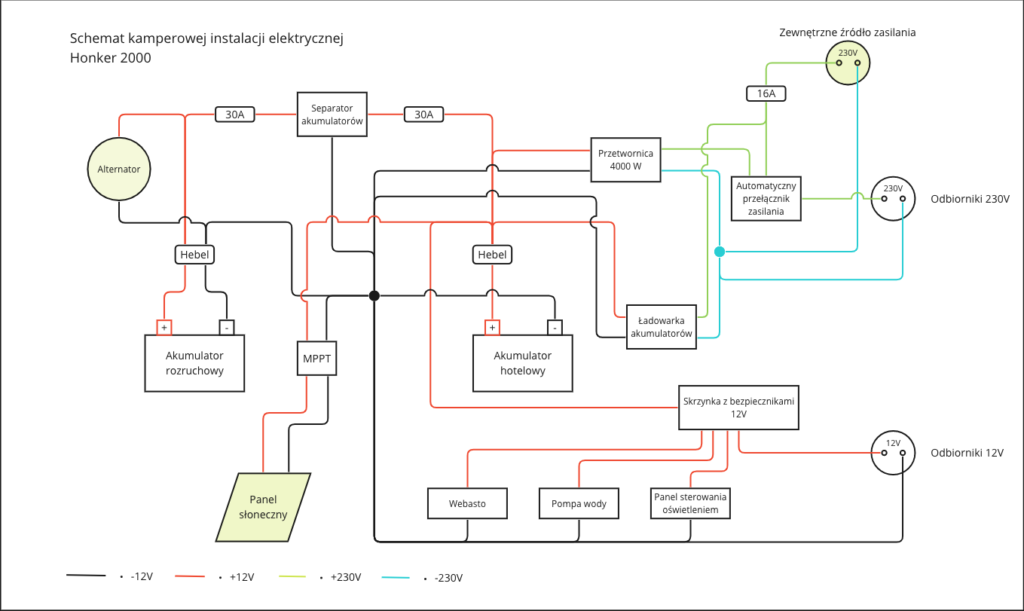
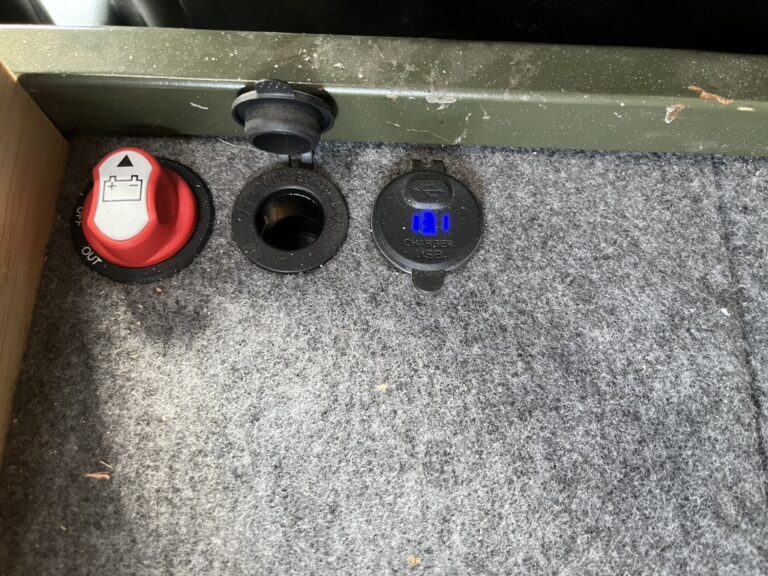
A battery separator is used here, which protects the starter battery on the one hand, and on the other allows you to charge the hotel battery while the engine is running whether you are driving or standing. The best application here would be a DC-DC charger, but this is a much more expensive solution and a much more "delicate" device. The separator I used is a CarGo, for less than PLN 100. The input threshold is 13.3 V and the cutoff at 12.8 V. In various camper installations I have used different separators from different companies more and less intelligent. This one is the most "clumsy" but also the most reliable.
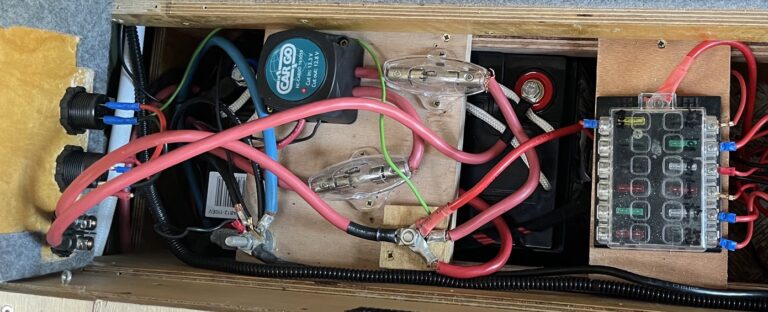
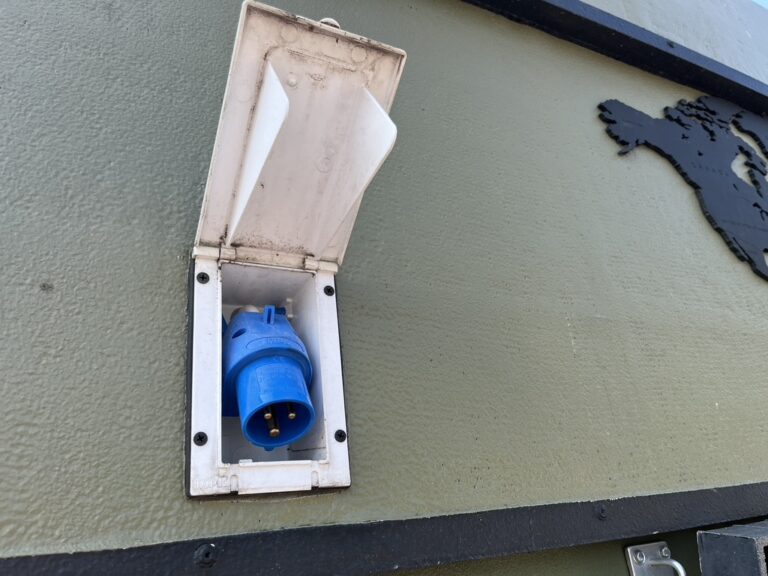
Under this installation is plugged battery charger brand MEAN WELL. This device is worth every zloty I spent on it. Very clever charger that thinks for me. If I need it, it charges, if I don't need it, it doesn't charge. If it charges, it chooses its own charging parameters depending on the type and condition of the battery. My task is only to connect the external power supply and the whole thing happens automatically by itself. As you can deduce from the diagram, the charger is connected to an external power supply bypassing the automatic power switch, that is, it works only with an external power supply.
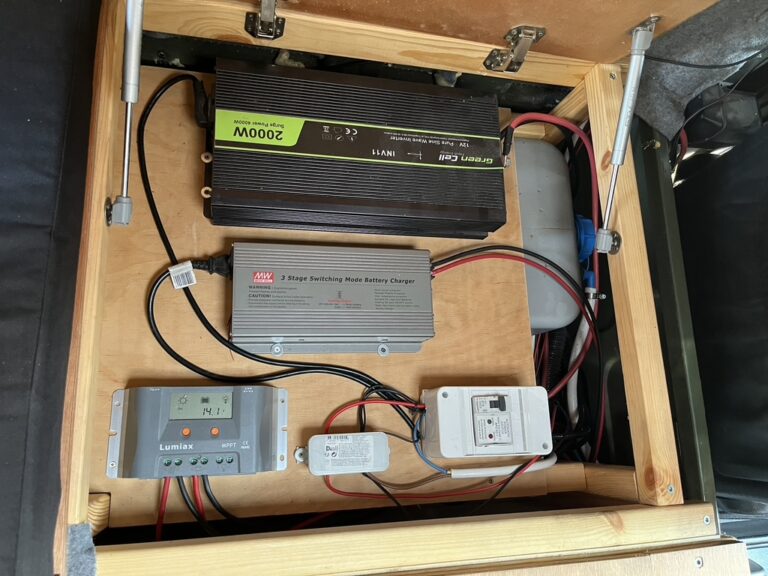
The charger is that gray device in the middle, while the automatic power switch is mounted in the white electrical box and has two LEDs: red and green. Its function is to recognize the 230V power source and automatically switch this source to the internal installation. It works in such a way that if there is no connection to an external power supply it feeds the current from the inverter, if I plug in the external power supply it cuts off the inverter and feeds directly from the mains. With this solution, I have one 230V internal installation no matter what source I use. Here again, it is automatic which means it frees me from thinking.
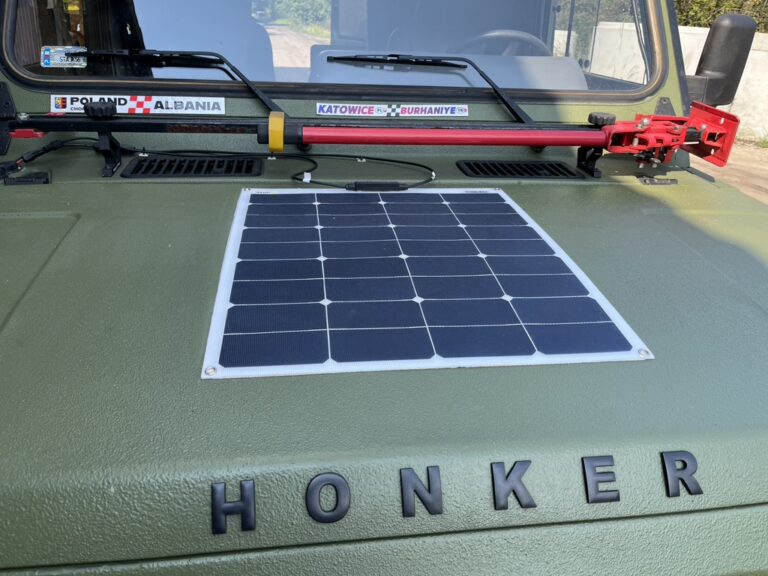
The photo also shows an MPPT controller, which is the third charging source for the hotel battery. The photovoltaic panel I have installed on the hood is 60W. It's not a big panel, but it compensates for the energy consumption of the refrigerator, which is a compressor refrigerator and needs 40W in peaks. This allows me to function without additional sources 2-3 days longer in sunny weather.
There is also a 2000W inverter that provides 230V in full sine wave in the absence of external power. It's a big and powerful inverter but it allows me to use any power tools or the aforementioned pressurized coffee maker even in a total remote area.
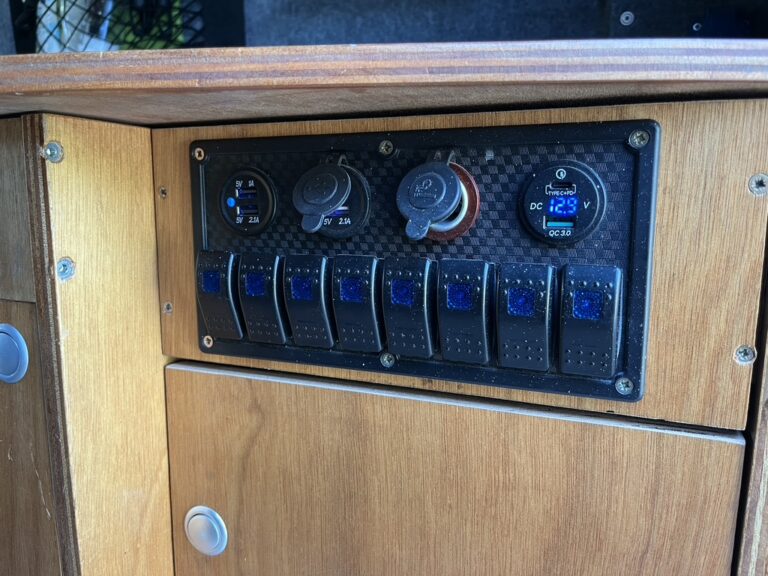
The indoor installation actually consists of two 12V and 230V. The key here is to choose the right wires especially for 12V installation. I, depending on the power requirements, used wires with a diameter of 1.5 mm2 or 2.5 mm2. Between the batteries and the inverter 25 mm2. It depends on the amperage you anticipate and the plan for the internal installation. The selection of wires should be taken very seriously because it is the most common mistake that leads to failures and fires. Each circuit has its own fuse, also matched to the load, in the fuse box. There is a control panel for both indoor and outdoor lighting. The outlets used in the installation are standard 12V and 230V outlets. All USB or 5V sockets are plugged into the 12V installation.
Water system
Here it's all about securing a source of drinking water, a quick and easy way to refill and use it. To this end, I mounted two tanks of 30l each on two sides of the car behind the driver's and passenger's seats, giving me the ability to take 60l of water with me. The tanks are permanently mounted without the ability to remove them but with the ability to easily refill them. To this end, a water filler is mounted on the outside of the car for both refilling through a pressurized hose and any tank or carnister.
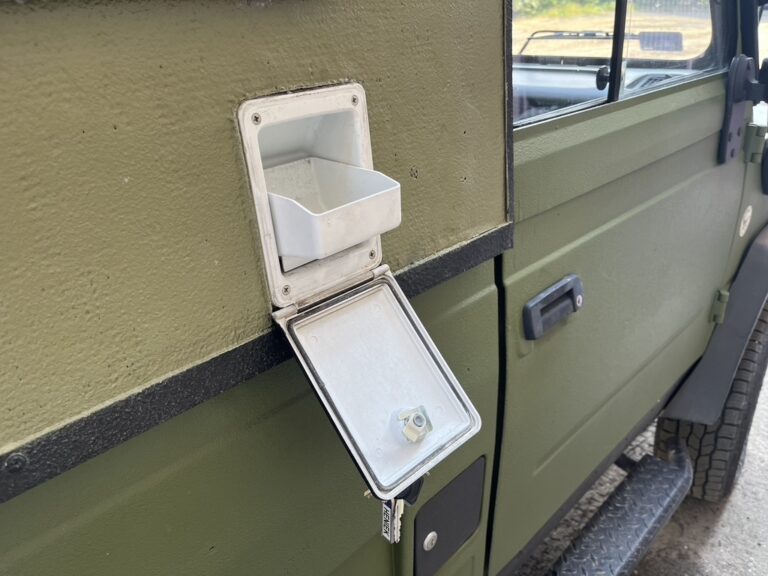

The tanks themselves are connected at the bottom with a flexible pipe fi 40 so that water can flow freely between the tanks, and at the top with a pipe fi10 so that the tanks can vent each other. The water inlet is locked with a key so that it is not possible to add or add something to my water source. The tanks themselves still have water filters installed with silver particles to treat the water and protect it from bacteria. This is enough for about 1,000 liters of water and treats the water 2 hours after filling the tanks.
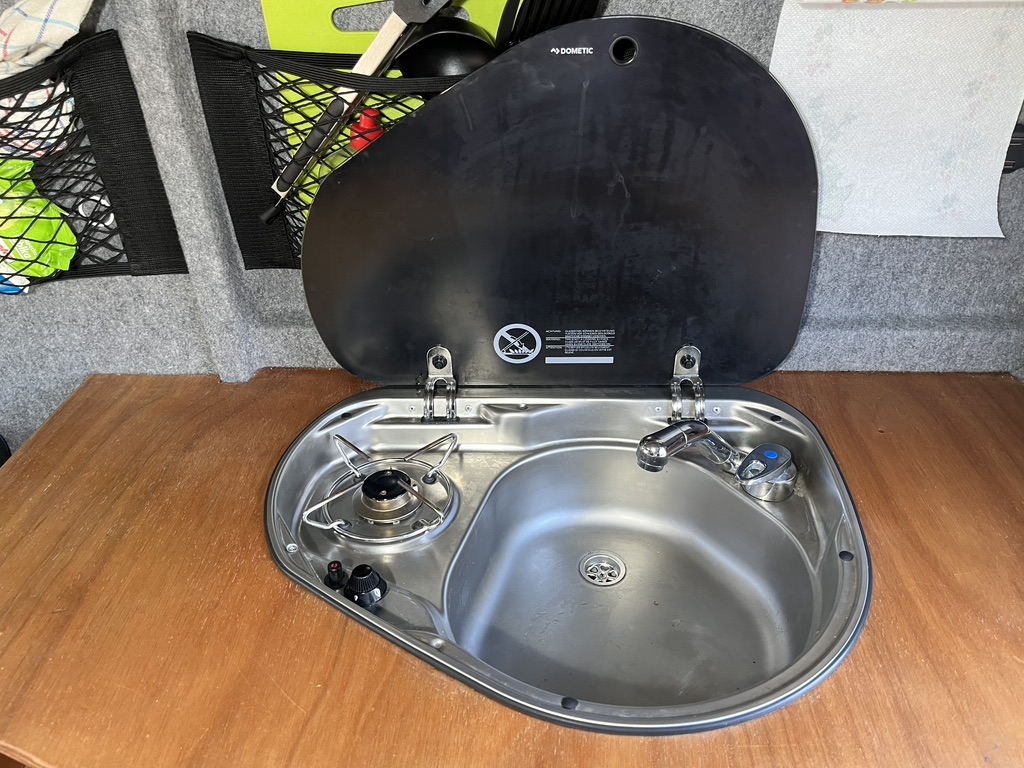
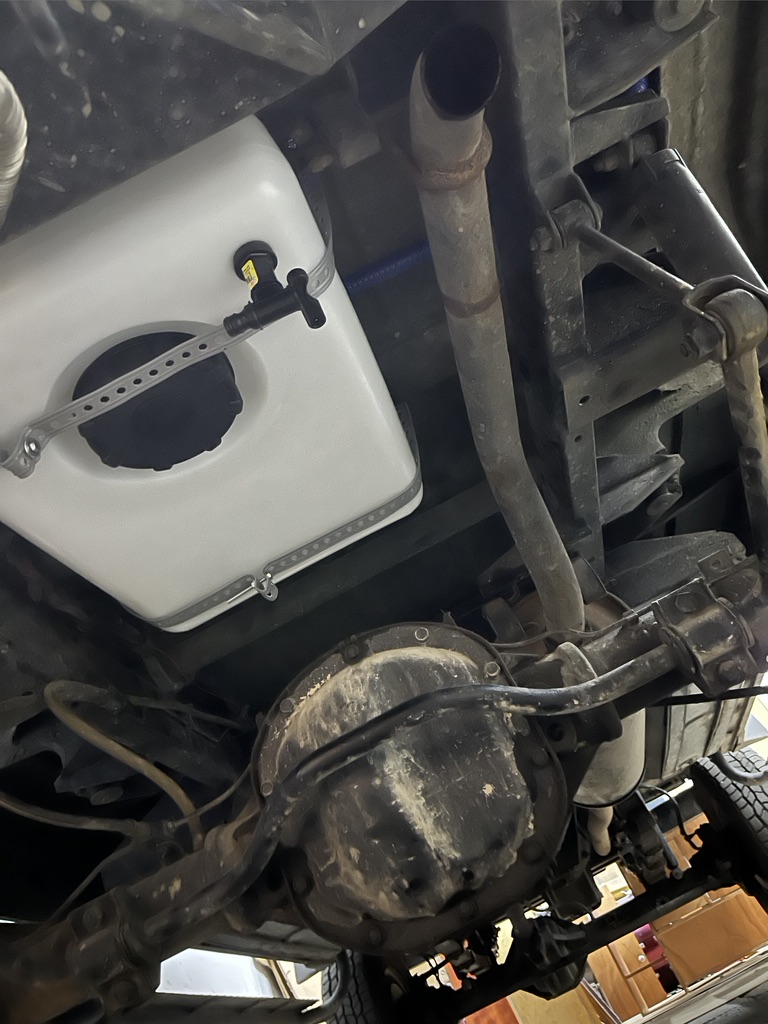
The indoor installation is actually a sink integrated with a gas stove and a spout with a micro-switch that activates a submersible water pump with a capacity of 10l/min. The sink is used in the same way as at home. In my case, it serves both as a kitchen appliance and for personal hygiene like brushing teeth or such. To the spout I can hook up a shower line which allows me to take a shower outside the car. The sink drain is hooked up to a tank of so-called gray water mounted under the car. The idea is to store the used water and empty it in places designed for this purpose and not directly under the car. The gray water tank has a capacity of 20l. It fits within the contour of the frame, which does not affect the off-road usability of the car.
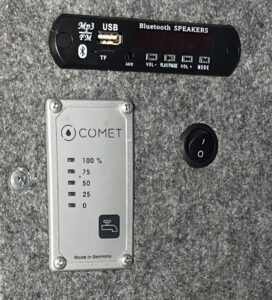
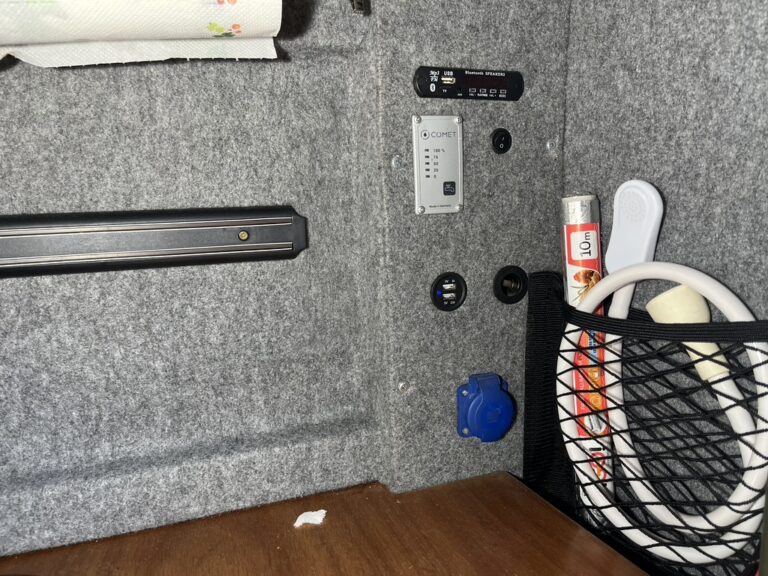
A level sensor from COMET is installed in the clean water tanks and thanks to the panel shown in the photo, I can check the water level in the tanks at any time.
Gas installation
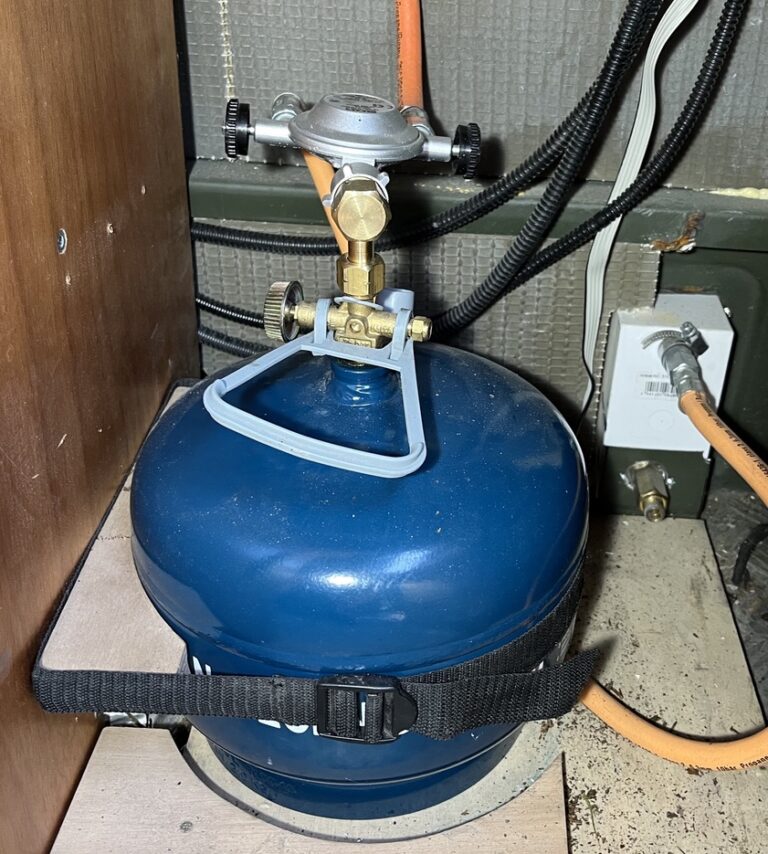
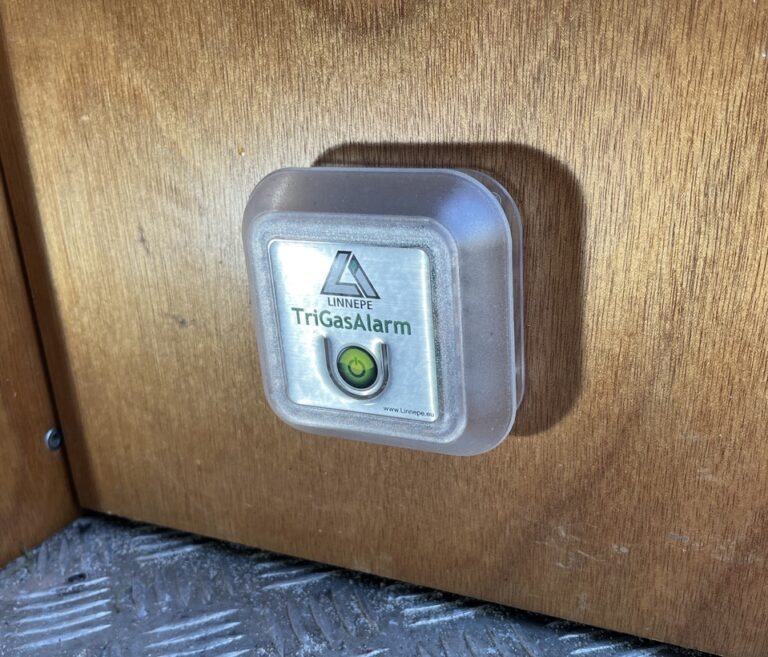
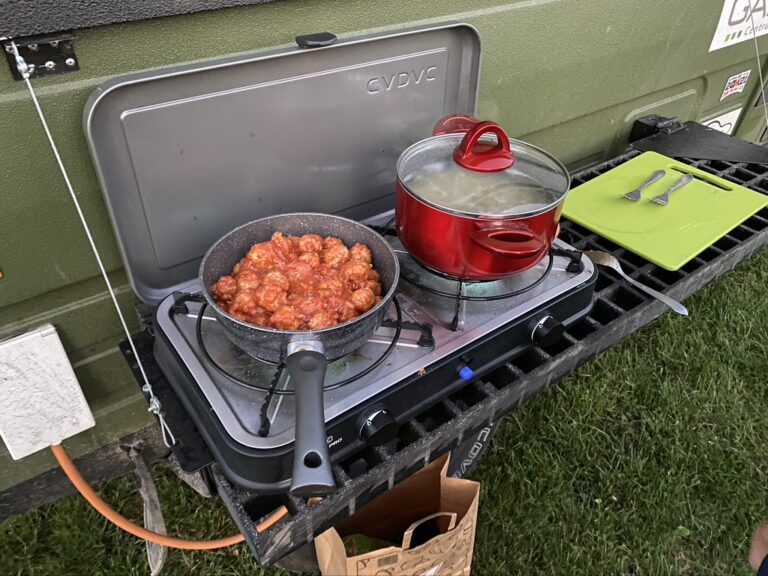
The gas installation is only for powering a stove integrated with a sink for cooking inside the car, and it has an outlet outside for hooking up a stove or gas grill. At the rear of the car in the kitchenette is a prepared place for a gas cylinder. The photo shows a 2.5 kg cylinder, but both a 6 kg and 11 kg cylinder can be accommodated there, depending on your needs. A double 30 mbar regulator is used so that gas can be supplied independently to the stove and to the outlet outside. I also have installed a gas sensor for safety. This sensor detects not only propane-butane gas but also toxic gases should someone try to let something poisonous into the car.
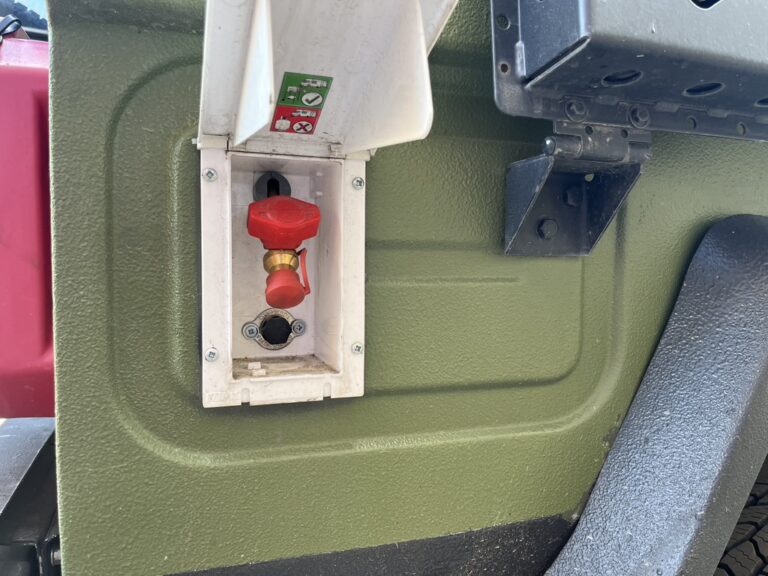
The outdoor stove or grill plugs into a gas outlet with a quick-release coupling, which is mega-convenient and works well. In addition, Kevlar traps are mounted on the sides, which when unfolded serve as a table
Author: Grzegorz Siwiec
Publication date: August 31, 2023
no comments on Cooking, washing, lighting in Honker expedition vehicle